Hey guys,
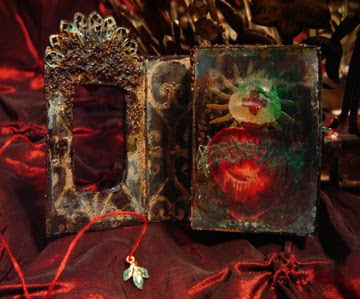
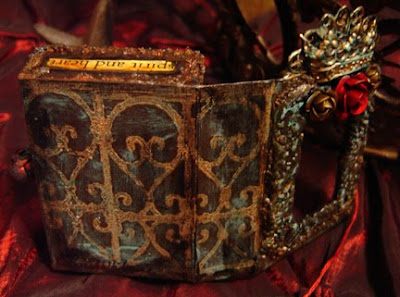
I am sorry I have been so lax in regards to updating this blog. I have so much going on right now with my wedding coming up and a few health problems that something has have had to give. Unfortunately, that means my blog and website are in serious need of some new art postings. Even though there hasn't been much activity here I assure you there is a lot of new juicy art in my studio right now. I just need to find the time to photograph and upload it all. :) So expect a huge influx of arty goodness after December. In the mean time, here are a few pieces I just finished to wet your appetite!
These are altered matchboxes in two sizes done with acrylic paints and mediums, mica, found objects and more. These were demo pieces for Alpha Stamps so the blank matchboxes, many of the metal embellishments and collage images can be found on their site. Enjoy!
"The Meaning of All"
Wednesday, September 2, 2009
Friday, July 17, 2009
Soul Journaling Prompt: Easy Backgrounds (part 1)!!!
For this prompt I’d like to share a few of my favorite backgrounds. Having multiple finished backgrounds done ahead of time is a great idea when journaling so that when you have the urge to write or draw or make a page, you can do so without worrying about having to prep you pages first. Making a bunch of backgrounds in your journal before you go on a trip can also be helpful for spontaneous art making and journaling. I always have 4 or 5 pages prepped and ready to journal on…more if it’s a long trip. :)
To start, I want to show you my most basic technique for priming a journal page and getting down a fast and easy background. This is the type of background I use all the time and is a great base for jumping off of with all your creative ideas!
Sarah’s must-have, easy-peasy basic background:
To start, glue down random ephemera onto your pages. Don’t use anything precious and do this in a fast haphazard manner. Ephemera can be pages torn out of old phonebooks, textbooks, dictionaries, sheet music, or any other papers you have lying around. This is a great way to use up small scraps of scrapbook paper and junk mail too. If you are using a thicker paged journal such as a watercolor book you don’t need to cover the entire page with ephemera. However, if you are using a thinner paged journal, take the extra time to cover all of your page to help reinforce it. Use any kind of glue you have handy to stick them down and don’t worry about them being perfectly flat. If they dry rippled it will just give you extra cool texture! ;)
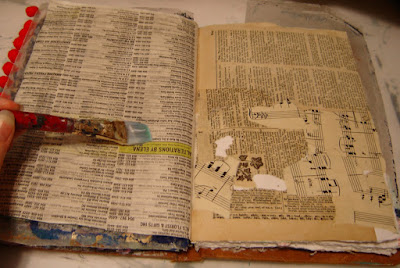
When your pages are dry, dry brush a coat of gesso on top. “Dry brush” means to use a light coat and a dry (no water) paint brush to apply your paint. The gesso will give a light tooth to your pages and is a fabulous primer to protect your papers from sloppy paints and messy work later on.
Tip: Pay special attention to the crease of your book, giving it a second coat of gesso for good measure.
Now choose 1-3 of your favorite mixable paints. For this, I chose green, blue and brown. They look nice separately and are fabulous when mixed together. If you are new to mixing paints try choosing a favorite color such as red and then using tints of red: made by adding black (or brown) and white to the red. This way you will have a red, pink, and deep red background. You can also experiment with color mixing and see what happens.
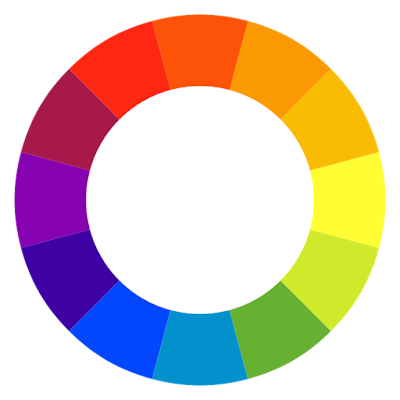
Tip: The more colors you mix, the better chance you have of getting a muddy brown color. When choosing colors from the opposite side of the color wheel to mix, such as purple and yellow, you will also get muddy brown. Instead, try colors next to each other on the wheel.
To start, I want to show you my most basic technique for priming a journal page and getting down a fast and easy background. This is the type of background I use all the time and is a great base for jumping off of with all your creative ideas!
Sarah’s must-have, easy-peasy basic background:
To start, glue down random ephemera onto your pages. Don’t use anything precious and do this in a fast haphazard manner. Ephemera can be pages torn out of old phonebooks, textbooks, dictionaries, sheet music, or any other papers you have lying around. This is a great way to use up small scraps of scrapbook paper and junk mail too. If you are using a thicker paged journal such as a watercolor book you don’t need to cover the entire page with ephemera. However, if you are using a thinner paged journal, take the extra time to cover all of your page to help reinforce it. Use any kind of glue you have handy to stick them down and don’t worry about them being perfectly flat. If they dry rippled it will just give you extra cool texture! ;)
When your pages are dry, dry brush a coat of gesso on top. “Dry brush” means to use a light coat and a dry (no water) paint brush to apply your paint. The gesso will give a light tooth to your pages and is a fabulous primer to protect your papers from sloppy paints and messy work later on.
Tip: Pay special attention to the crease of your book, giving it a second coat of gesso for good measure.
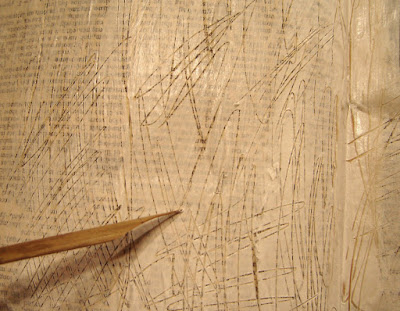
While still wet, draw or scratch into the gesso with the wrong end of your paintbrush or any other objects handy. Allow to dry fully. A hair dryer on low can also help speed up the drying process
Now choose 1-3 of your favorite mixable paints. For this, I chose green, blue and brown. They look nice separately and are fabulous when mixed together. If you are new to mixing paints try choosing a favorite color such as red and then using tints of red: made by adding black (or brown) and white to the red. This way you will have a red, pink, and deep red background. You can also experiment with color mixing and see what happens.
Tip: The more colors you mix, the better chance you have of getting a muddy brown color. When choosing colors from the opposite side of the color wheel to mix, such as purple and yellow, you will also get muddy brown. Instead, try colors next to each other on the wheel.
I added a dot of brown, blue, and green to different spots on my pages and then added water. I allowed them to mix and pool in random places.
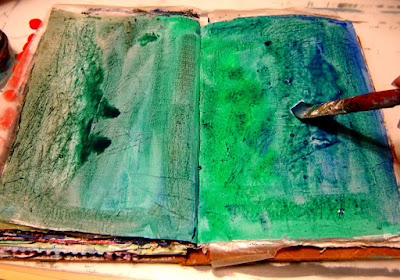
For extra pizzazz you can add a drop or two of interference paints with water. Here I have added interference blue, and though it is hard to see in the photos, in person it is very sparky and pretty. Allow this to dry fully and you’re all ready to add art to your new background! ;)
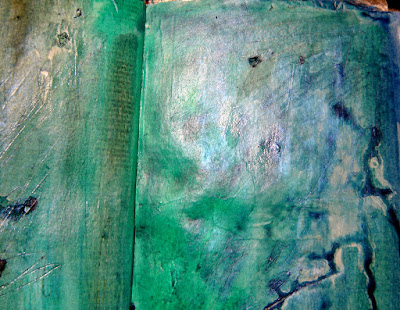
To get the free easy to print .pdf file of this and other new prompts join our inspiring Soul Journaling Community at: http://groups.yahoo.com/group/SoulJournaling/
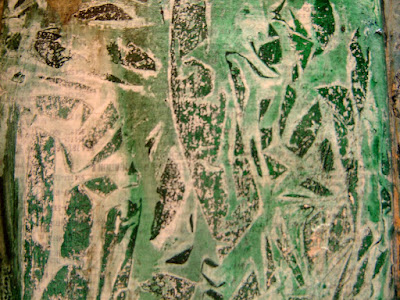
The following bonus backgrounds are also shown with instruction as part of the same easy to print file on our group. Come join the fun! :)
*SOUL HUGS*
Sarah
Friday, May 15, 2009
Soul Journaling Prompt: Tools and Materials Scavenger Hunt!
Your objective: To make a visual journal spread using only the tools and materials on the list below. No basic tools such as glue, paintbrushes, scissors, etc. can be used unless you find a way to make it fit on the list. For instance, “something metal” can be a tool such as a scissors. But do you really NEED a scissors? Or can you tear out your images? Something metal can also be a material such as a really cool embellishment. Challenge yourself to use objects in new ways and break free of relying on your favorite tools. But most importantly have fun!
SET……
GO!!!!!!
Your journal (primed and ready to go)
Something out of your trash bin
A paper clip
Something you got in the mail
3 colors of acrylic paint (your choice)
Something found on a sidewalk
Two different kinds of pens
Something Soft
A bottle cap
An image of someone smiling :D
An image of something that starts with the letter R
Something made out of plastic
Something sticky
Something metal
Something with a number on it
Something shiny
Something that starts with the letter A
Find these items and get creating!
Ready?.....
Ready?.....
SET……
GO!!!!!!
Your journal (primed and ready to go)
Something out of your trash bin
A paper clip
Something you got in the mail
3 colors of acrylic paint (your choice)
Something found on a sidewalk
Two different kinds of pens
Something Soft
A bottle cap
An image of someone smiling :D
An image of something that starts with the letter R
Something made out of plastic
Something sticky
Something metal
Something with a number on it
Something shiny
Something that starts with the letter A
To see all of my steps and get a special easy to print .pdf file of this prompt and future prompts join our Soul Journaling Yahoo group.
Here's my finished spread. I can't wait to see what you create!
*SOUL HUGS*
Sarah
For more info about Soul Journaling please visit: www.souljournaling.com
Saturday, April 25, 2009
SJAT Student Work!
Check out the fantastic work done in my last Soul Journaling: Advanced Techniques class!
Savannah F. from Canada!
Nathalie G. from Belgium!
Mary H. from South Dakota!
Janet B. from Australia!
Jane B. from Florida!
Bernie A. from Australia!
Christy S. from Florida!
Savannah F. from Canada!
Nathalie G. from Belgium!
Mary H. from South Dakota!
Janet B. from Australia!
Jane B. from Florida!
Bernie A. from Australia!
*APPLAUSE* Show these awesome ladies some love and make sure you leave a comment for them! :)
The next Soul Journaling: Advanced Techniques Workshop will begin on Friday May 15th (last day to sign-up for this class is May 15th) and this is also the last Soul Journal workshop I will be teaching this year so if you're interested now's your chance. ;)
Subscribe to:
Posts (Atom)